OMAX Microscope and Camera
This page explains OMAX microscope, camera attachment, and accompanying laptop operation.
Getting Set Up
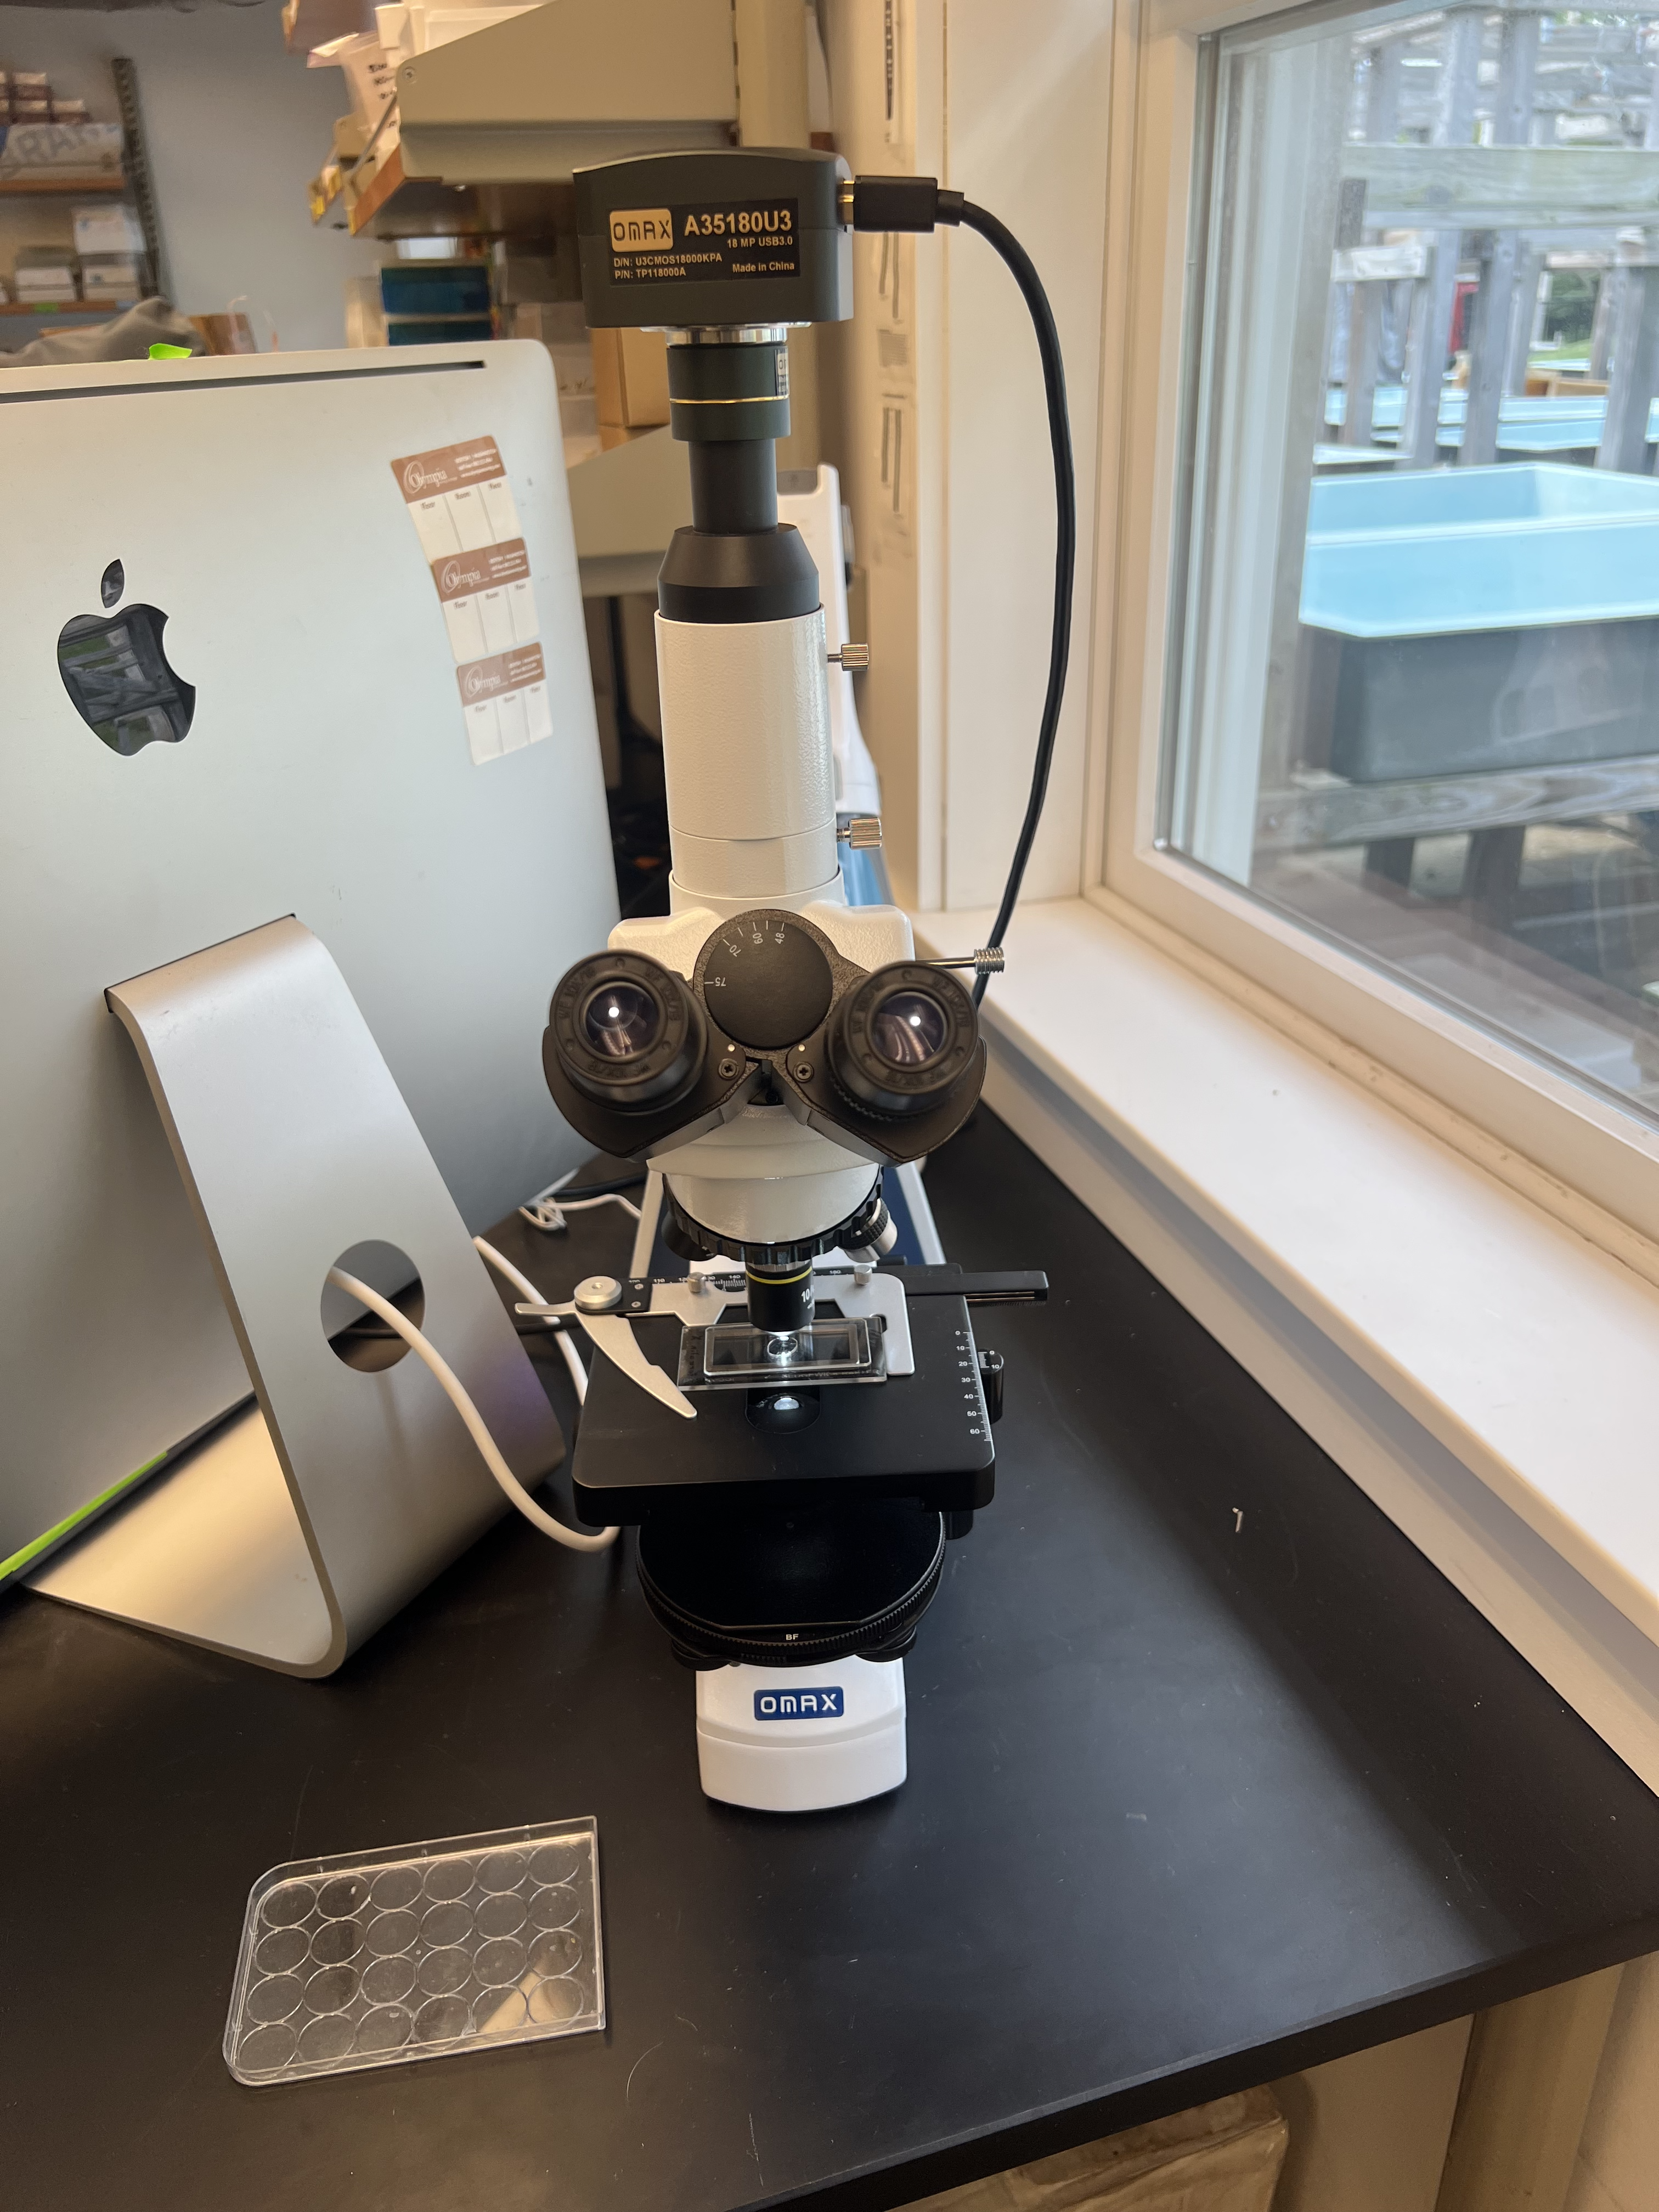
The OMAX microscope is located on the frontmost lab bench next to the lab Mac desktop and below the shelves with white sample boxes
Remove the plastic covering from the microscope. Plug the microscope into the wall if it isn’t already.
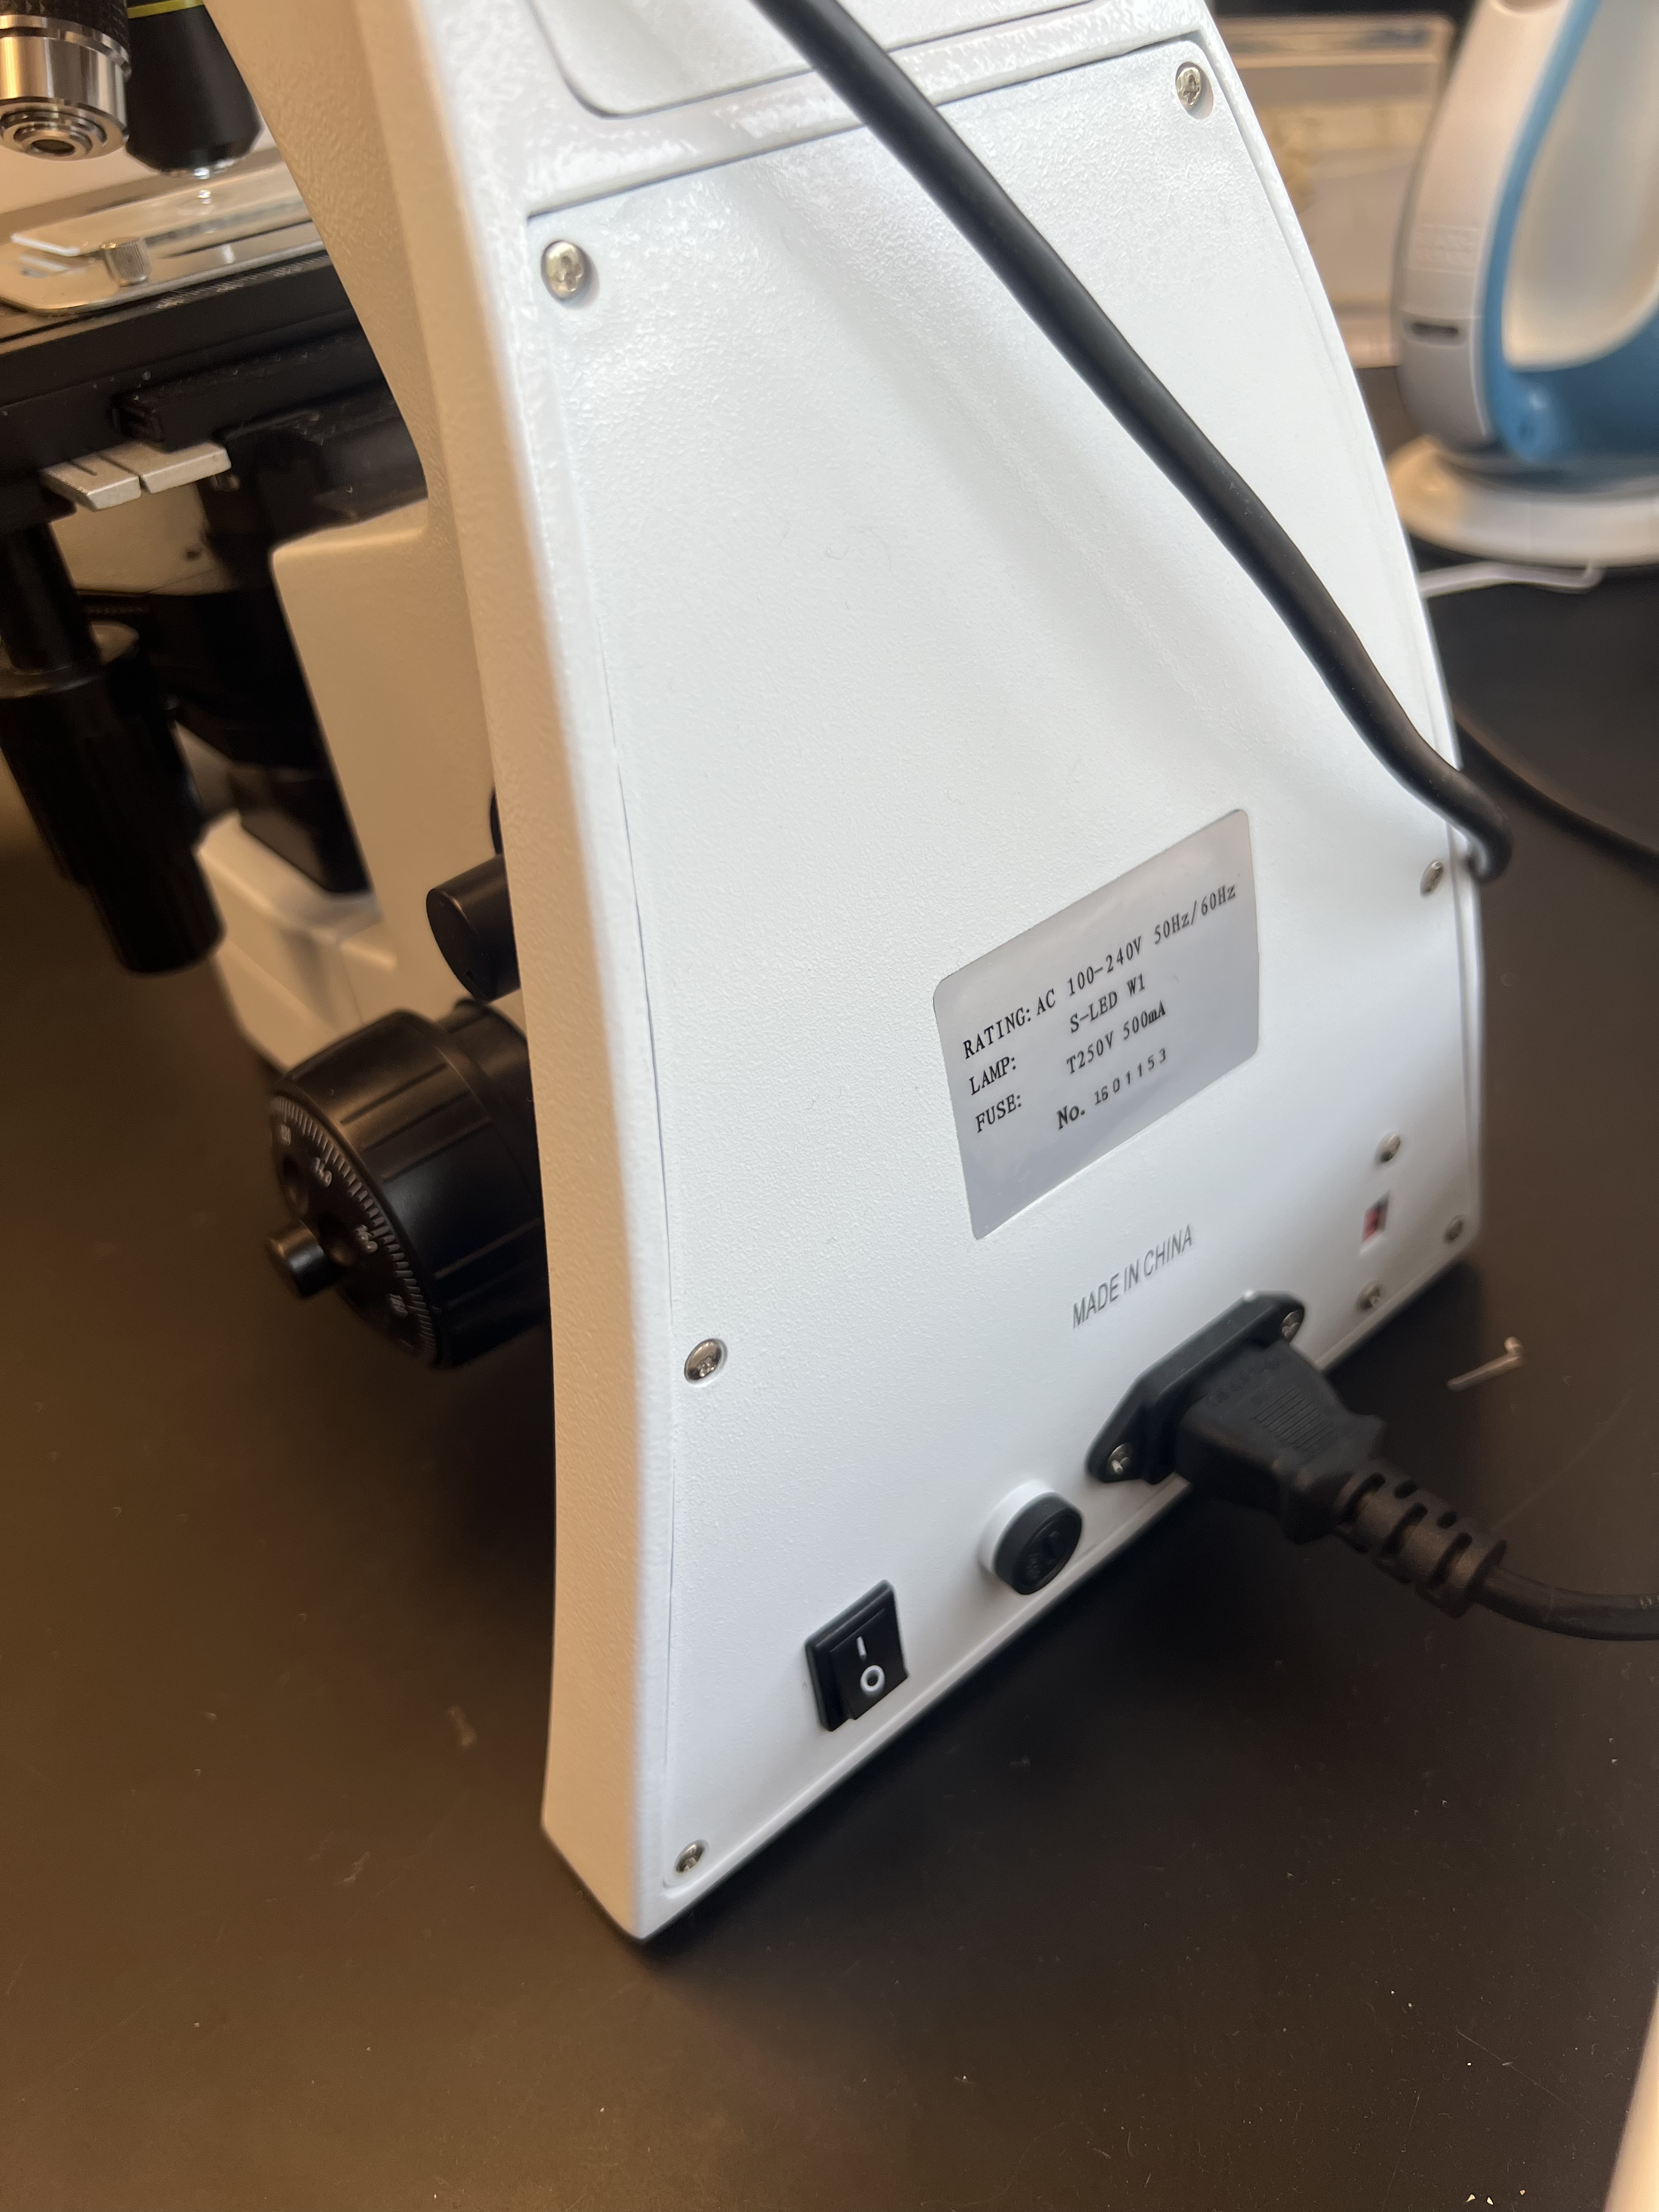
Turn it on using the switch in the back. You’ll know it’s on when blue lights on the side of the scope start glowing and the sample illuminating light turns on.
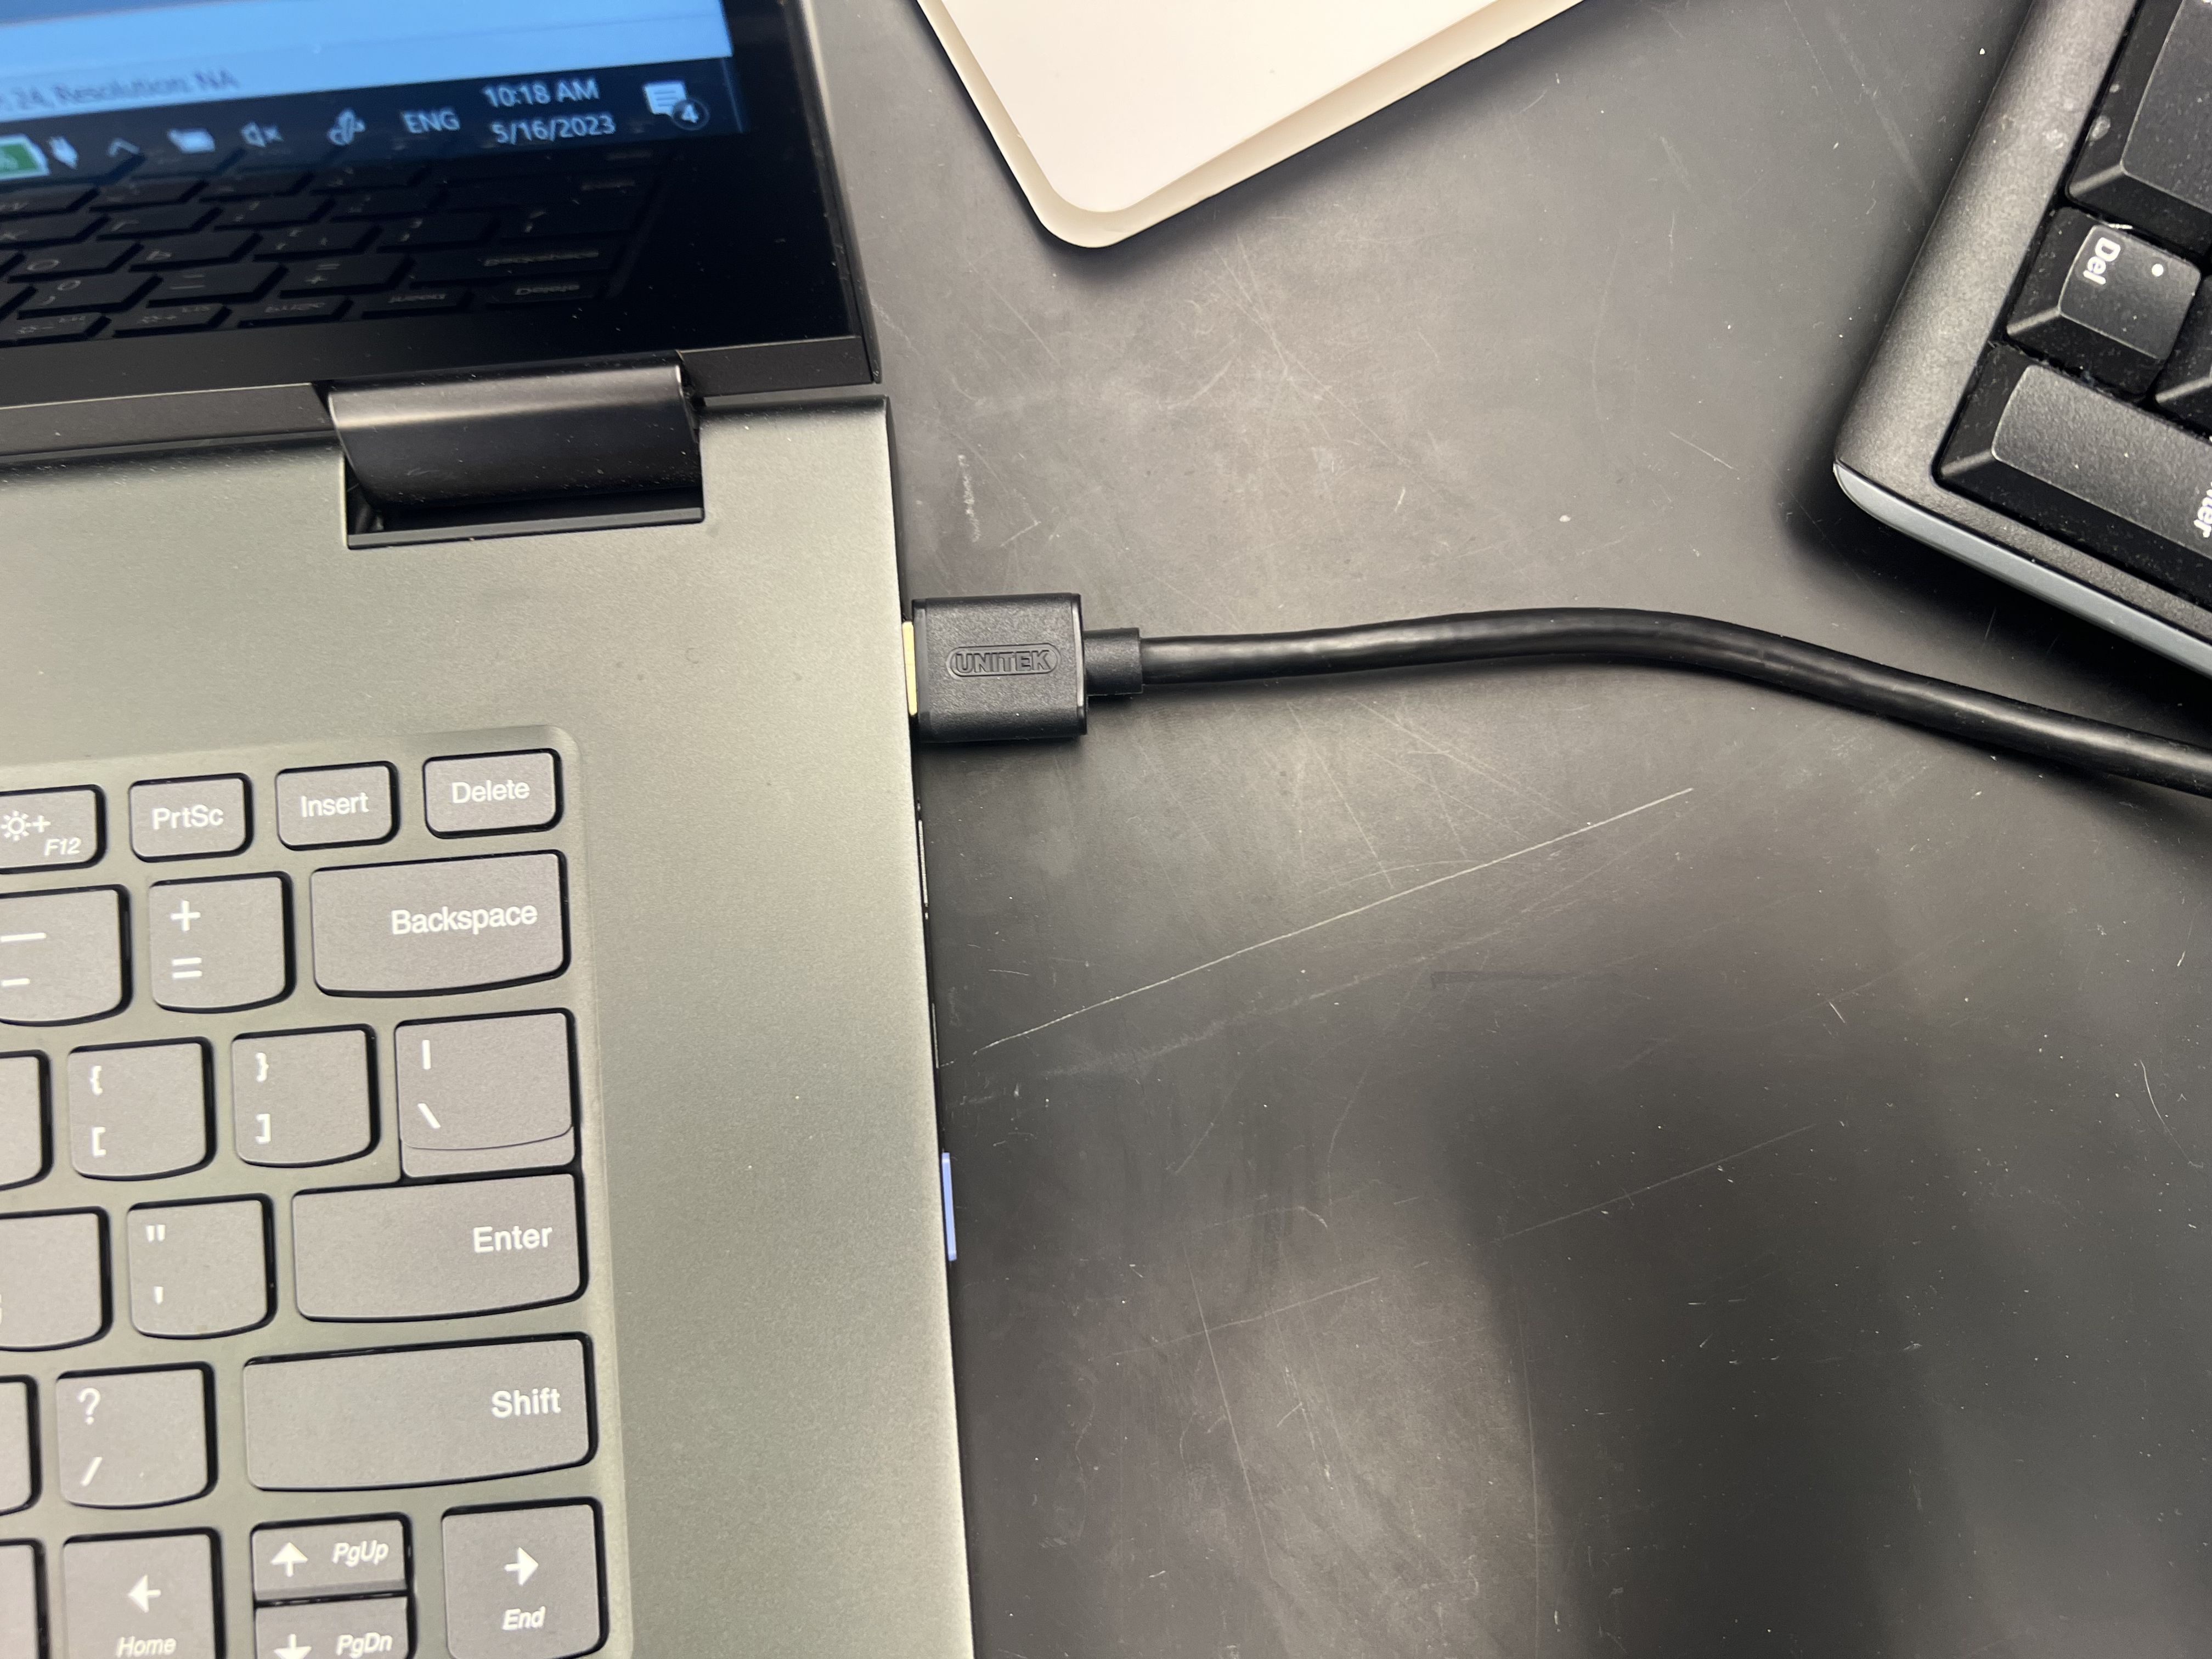
If you want to take images of what you’re looking at on the microscope, use the Lenovo YOGA 730-15 laptop located on the counter next to the microscope.
Power on the laptop using the long button on the right side next to the cable ports. The light will glow white when the laptop is on.
Make sure the Unitek cable is plugged into both the laptop and microscope.
Imaging
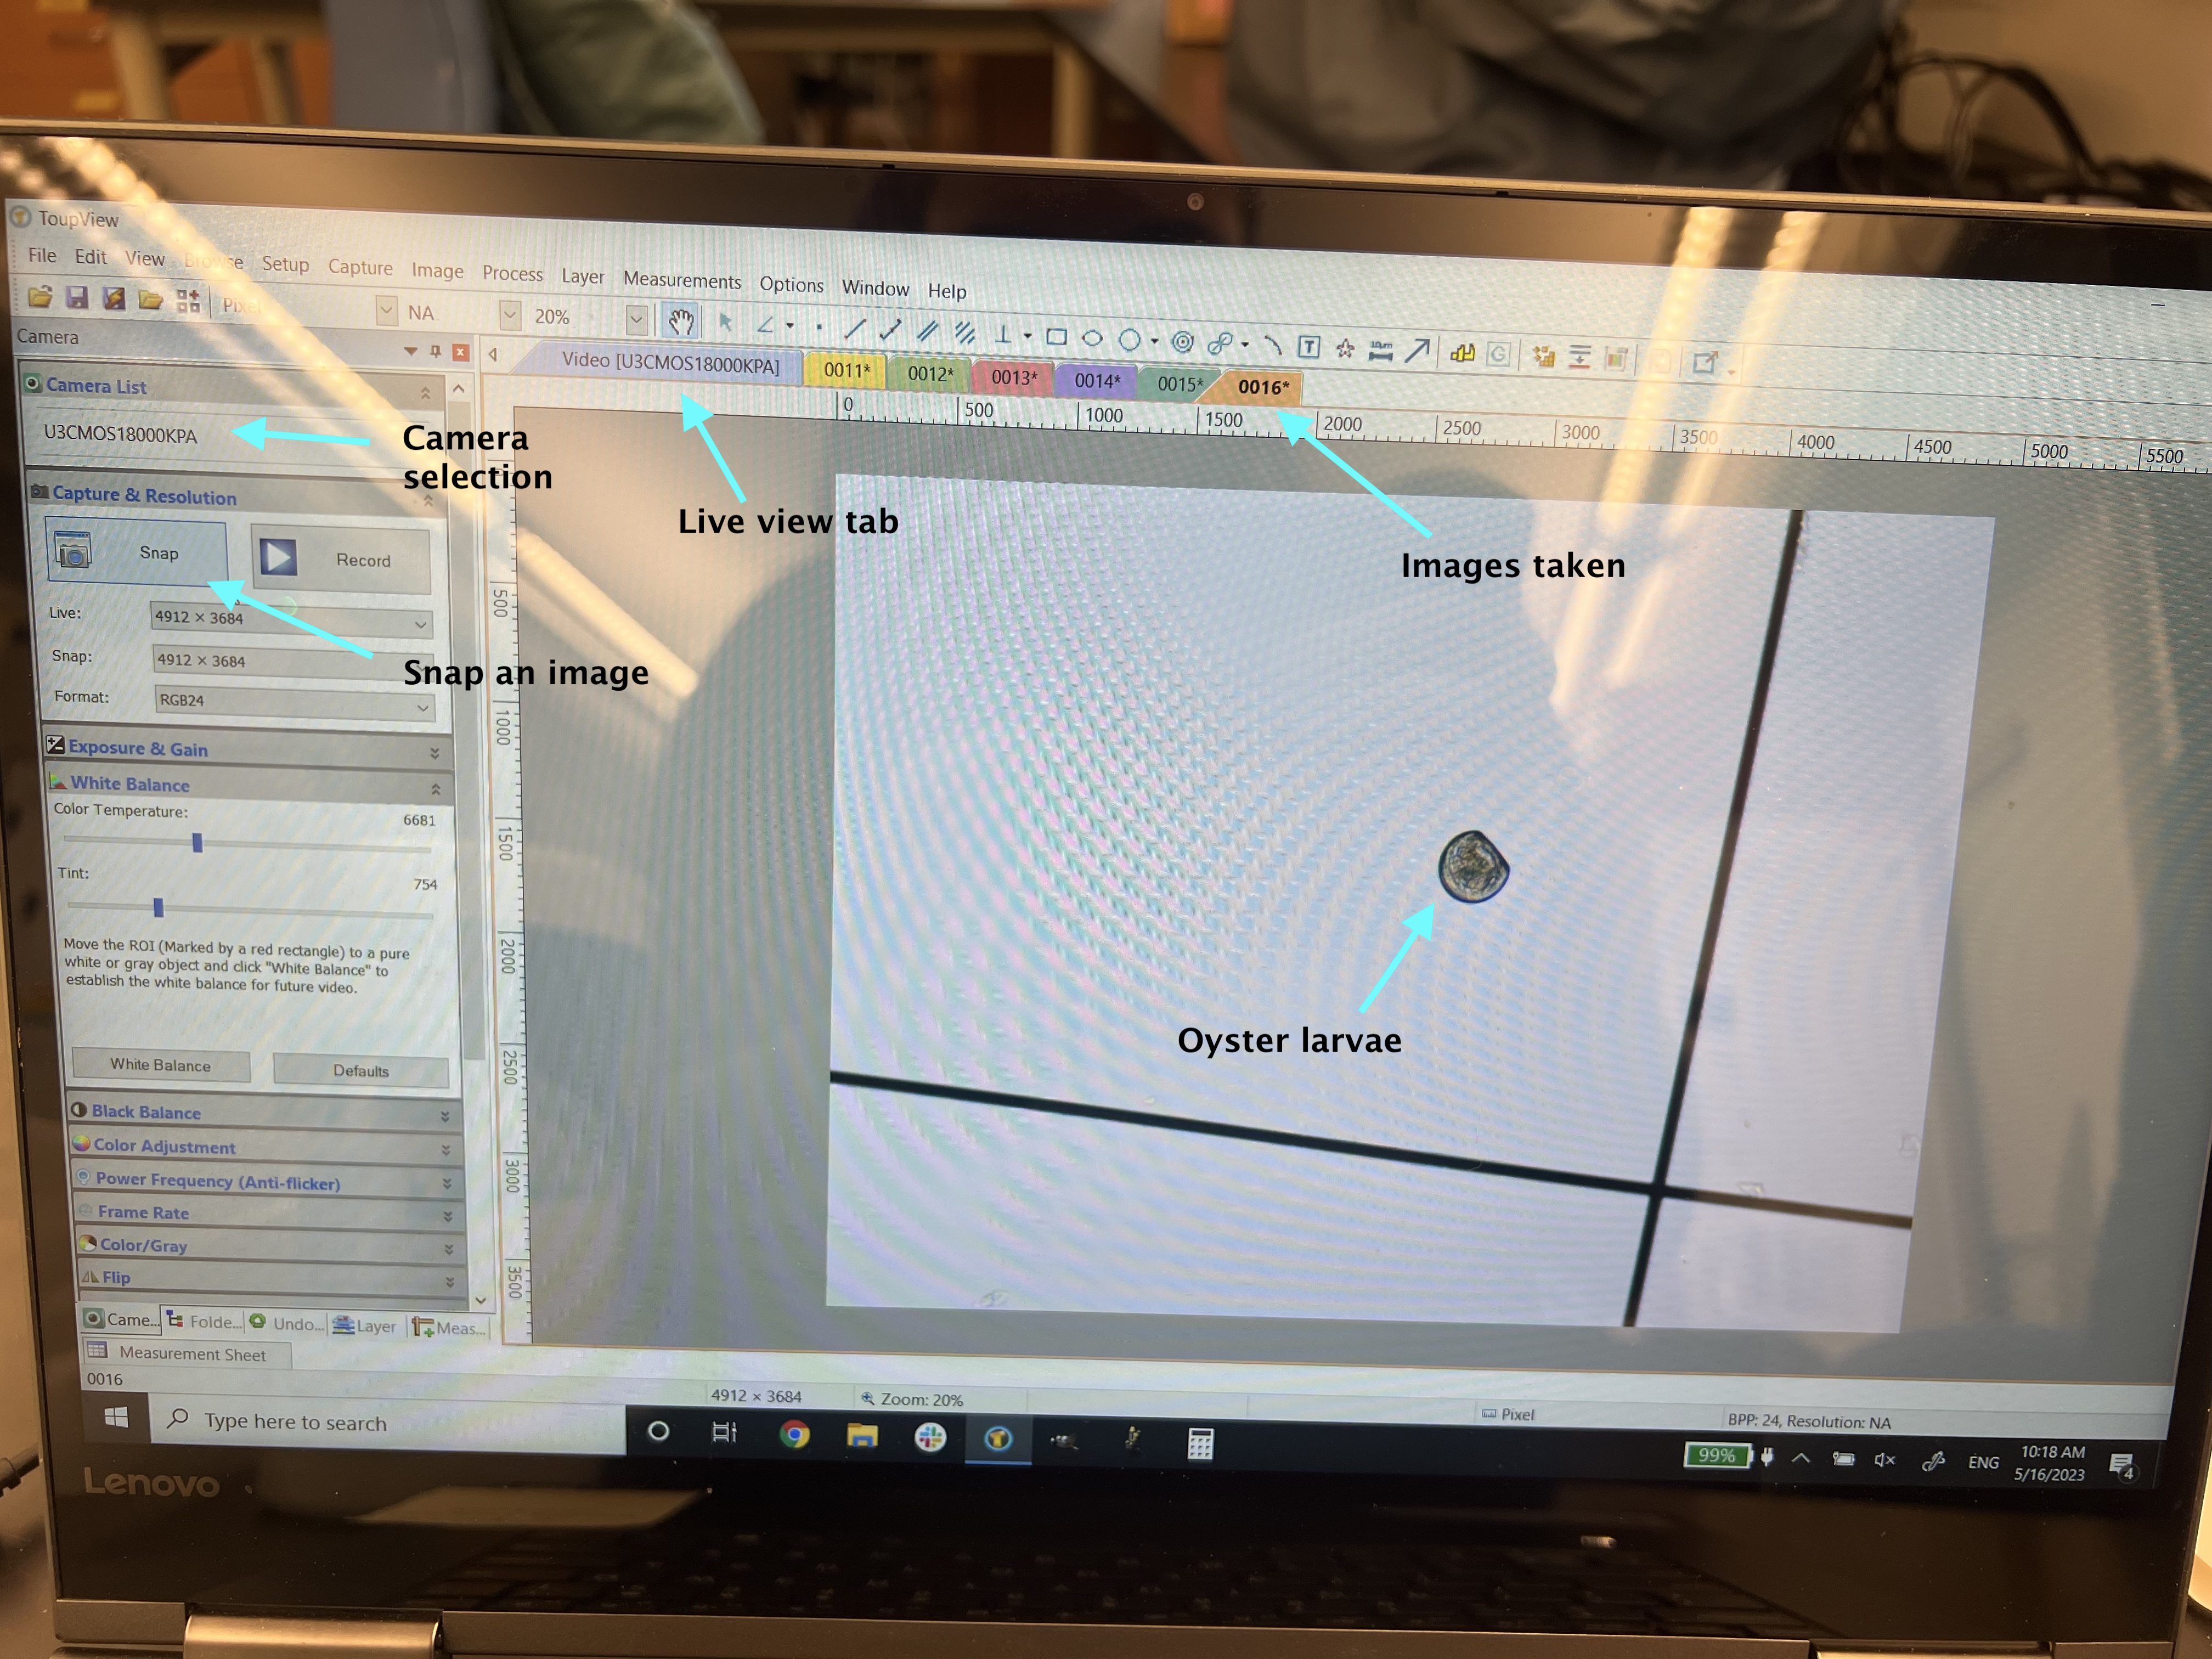
Open the ToupView app.
Under “Camera Options” on the left tab, select the camera that shows up. If no camera is available, unplug and replug the Unitek cord connecting the laptop and microscope.
Once the camera is selected, you should see a live video of the current view through the lens of the microscope. The image on the laptop may be rotated differently than the one on the scope.
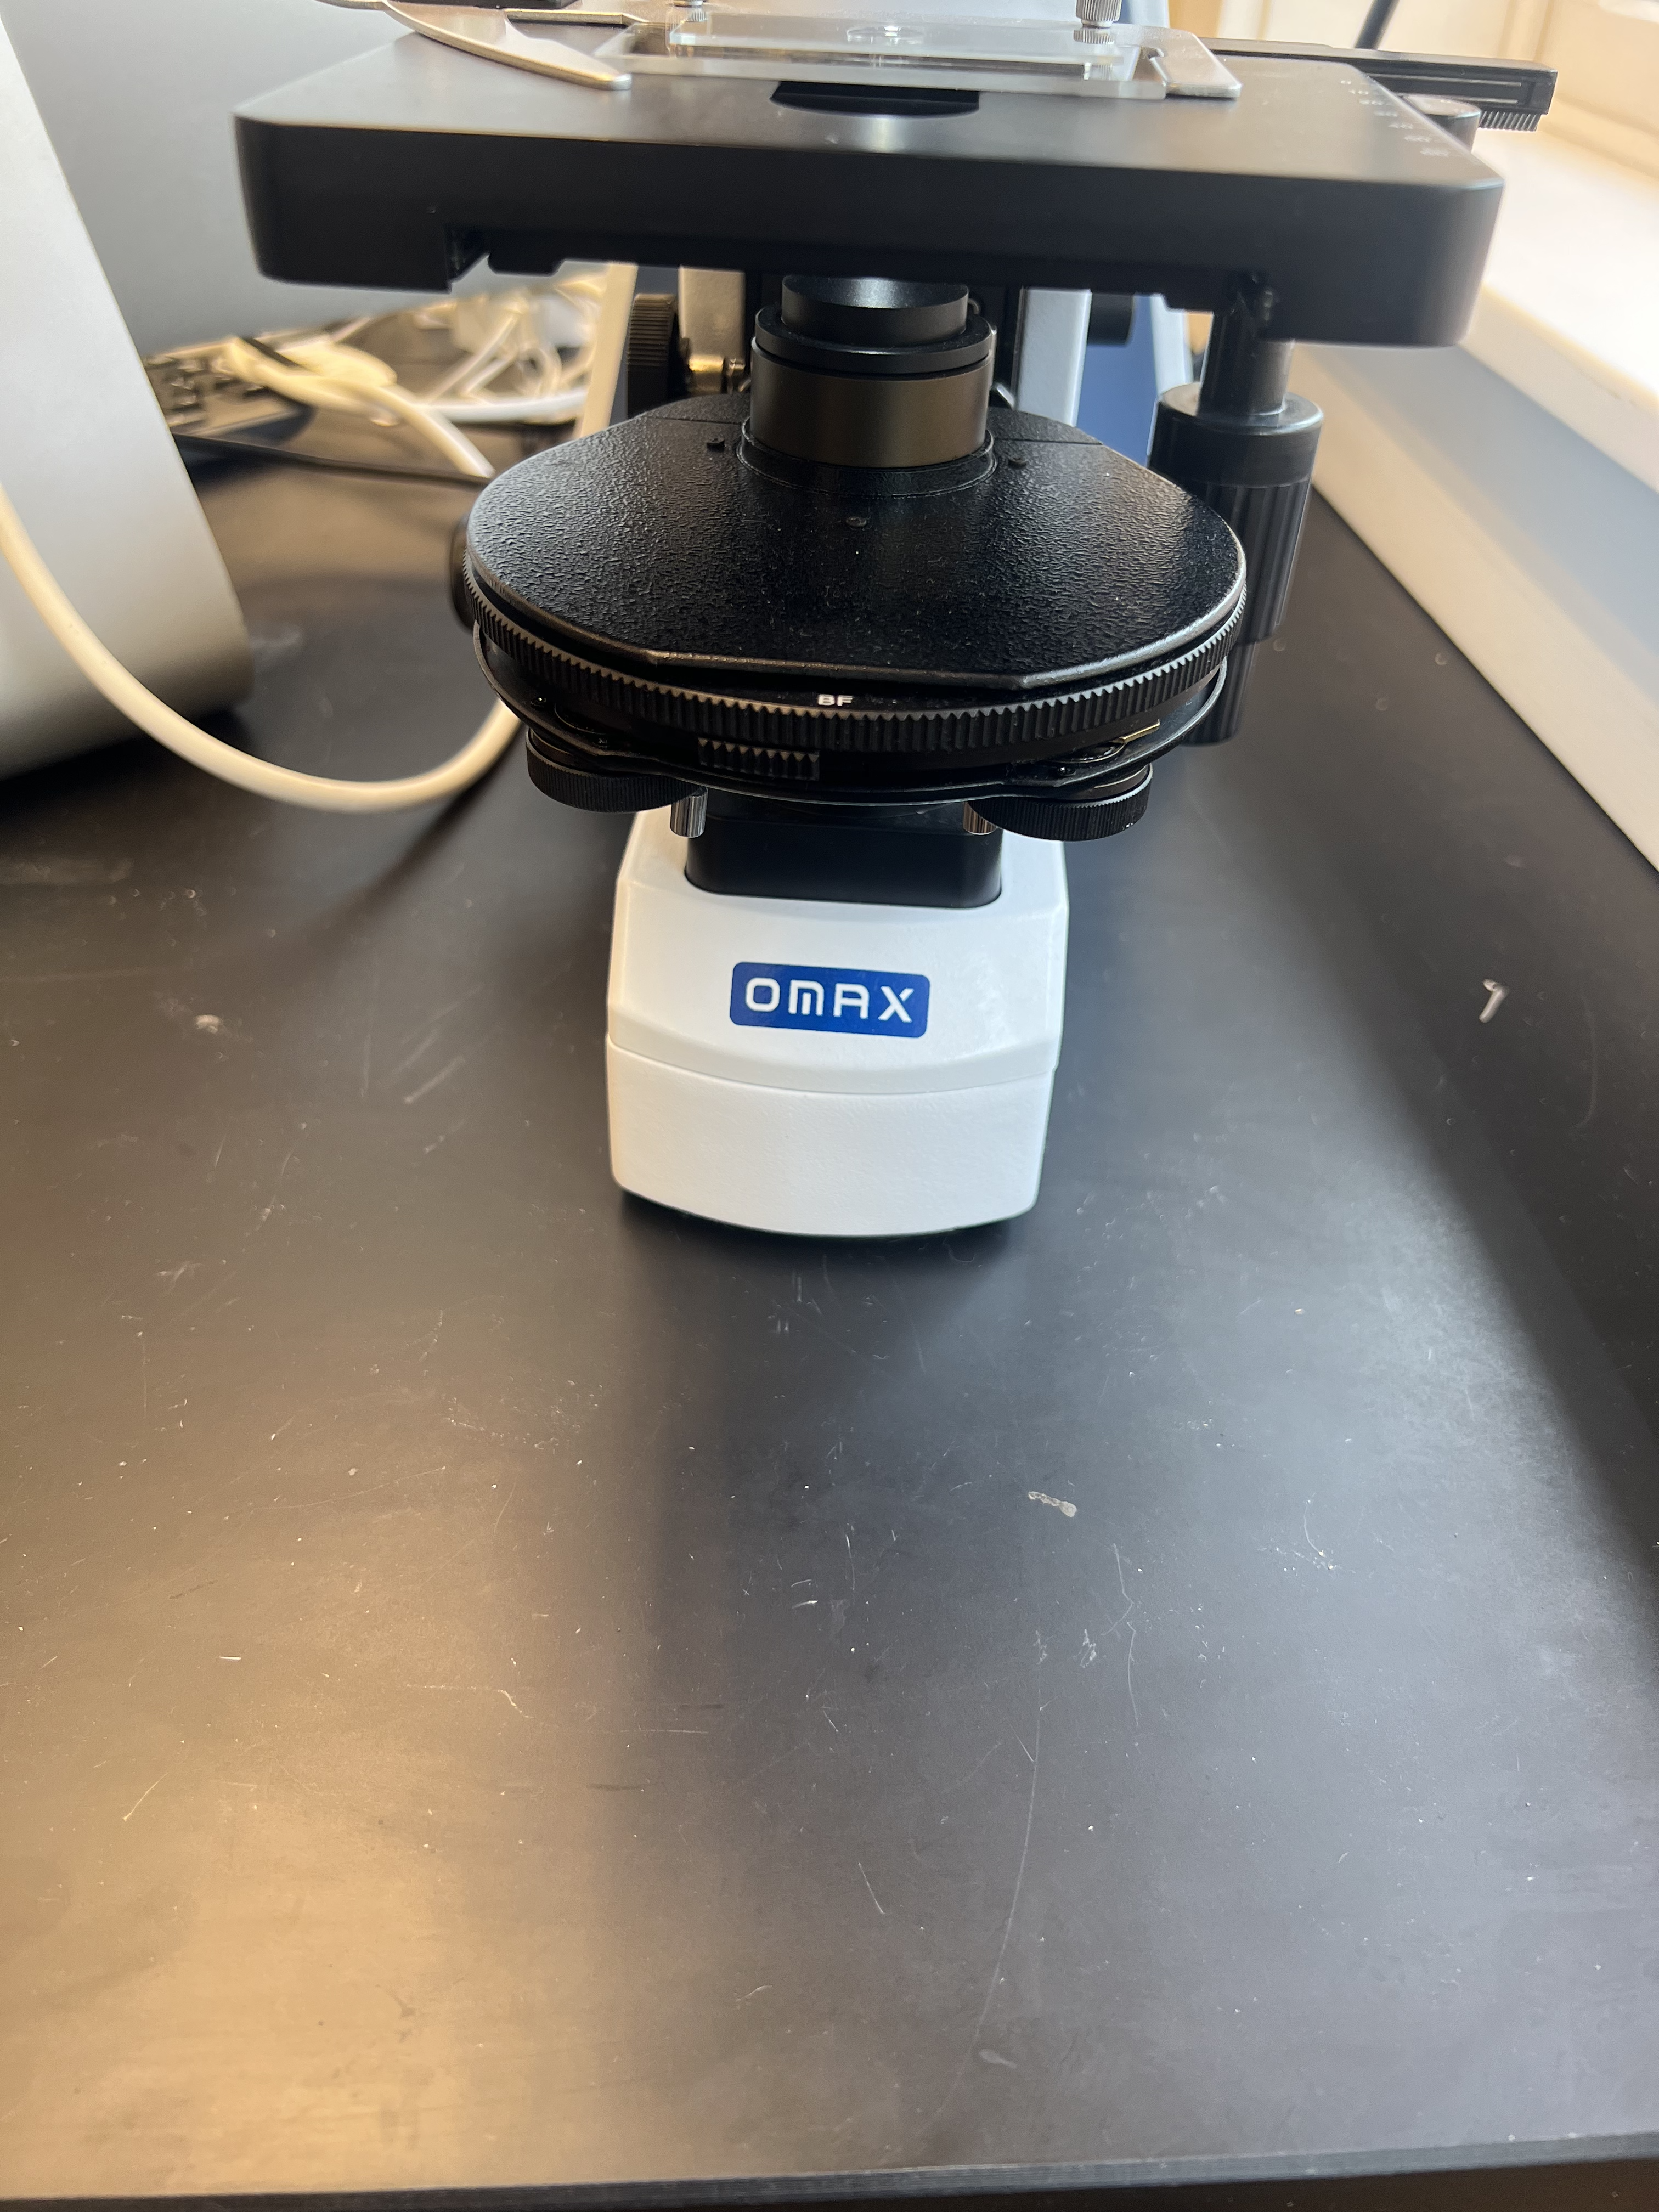
Get your sample in focus by adjusting the stage position. You may need to adjust the brightness of the light illuminating your sample. To do that, twist the dial under the stage.
To take a picture, hit the “Snap” button on the left side of the screen. The image should show up as a jpg file on the top bar of the screen
To return to the live video, click the Video tab on the top bar.
To look at previously taken photos, click through the files in the top bar.
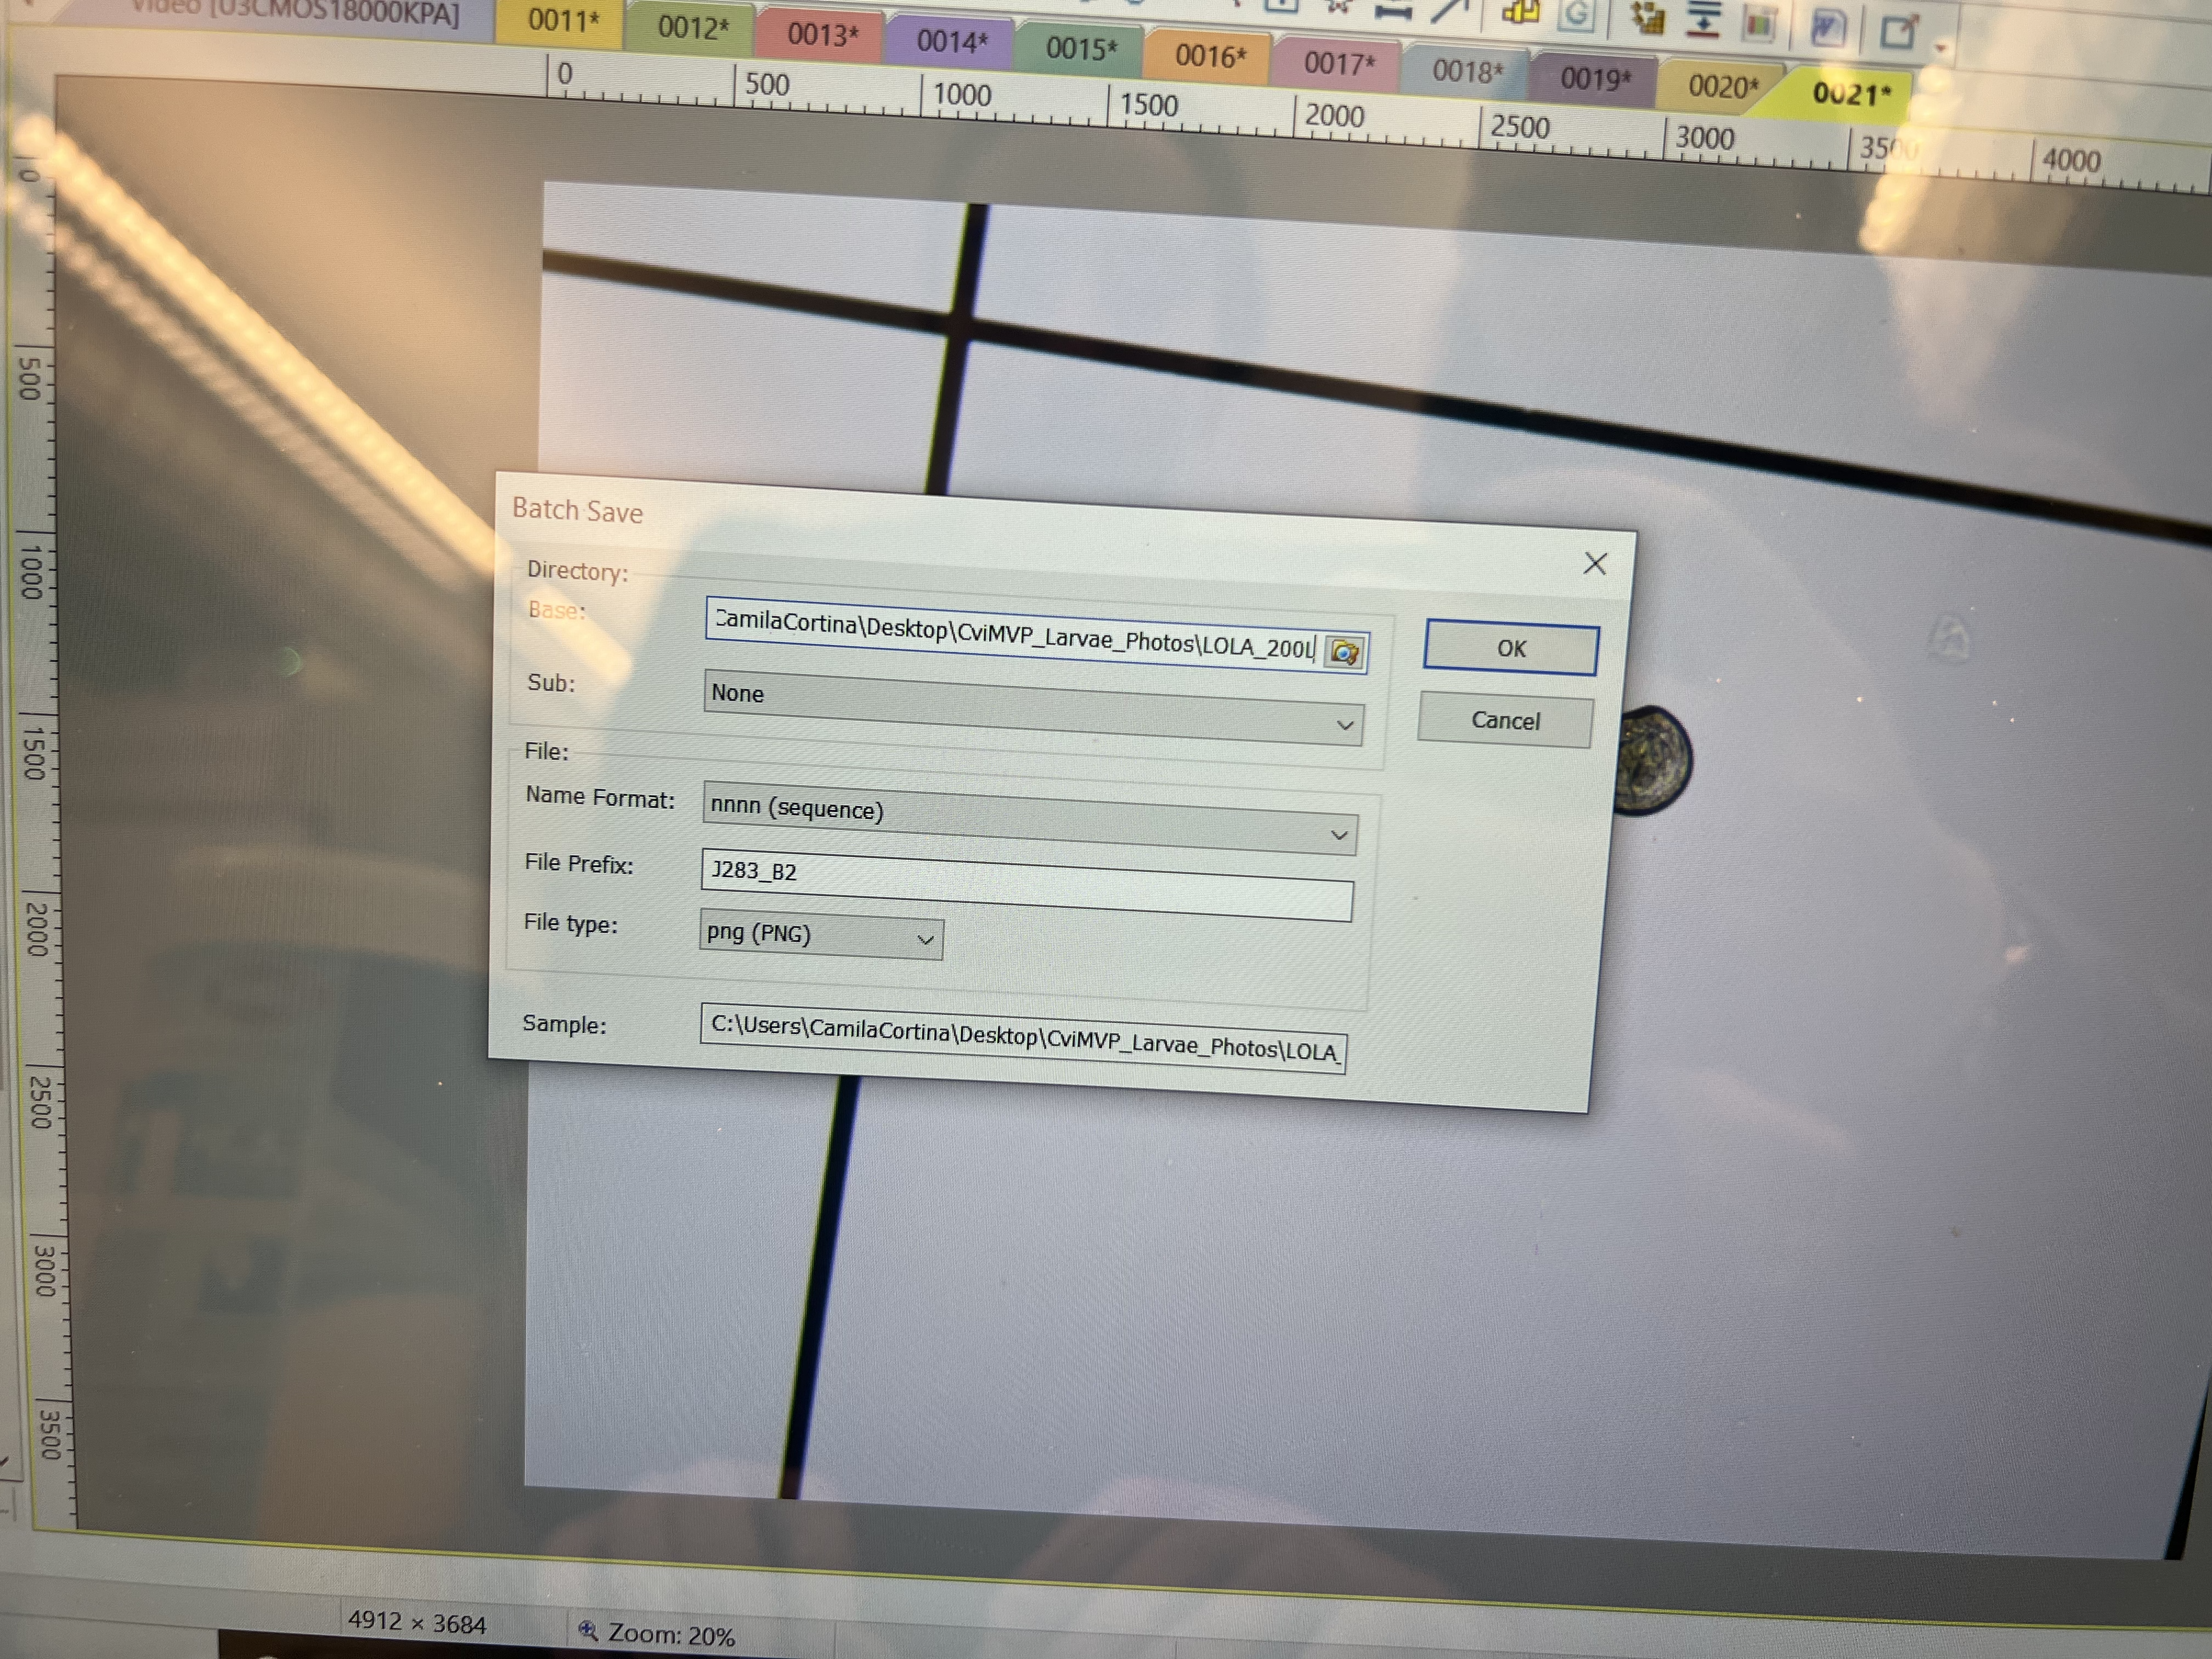
Saving Images
Once all photos have been take, follow this flow to save:
File, Save or Batch Save for multiple images, and then select the folder you want to save them to.
A pop up will show asking you to fill out the path to save the file. The format is User/Desktop/Folder/Subfolder/Sub subfolder and so on. The last folder in the sequence is the one where your image(s) will save.
CviMVP Larval Oyster Sampling
To sample larval oysters, start with a 4x magnification. Look around the sample to identify areas with specimens.
Once an area is identified, move up to the 10x magnification. Once you have found an individual that is horizontally oriented (meaning from the lens view, the oyster is situated horizontally flat), snap an image.
- You want to image larvae that are horizontally oriented, have a dark outline, and are well preserved.
Save the images to the folder labeled “CviMVP_larvae_Photos” and create a subfolder labeled with the population, larvae age, and tank size of the imaged individuals (ex. LOLA_Day2_60mL).